Short answer. A local number is the first thing you need abroad, because your bank, your university portal, your accommodation and every app want a number to send a code to, and your Indian SIM in roaming is too expensive to live on.
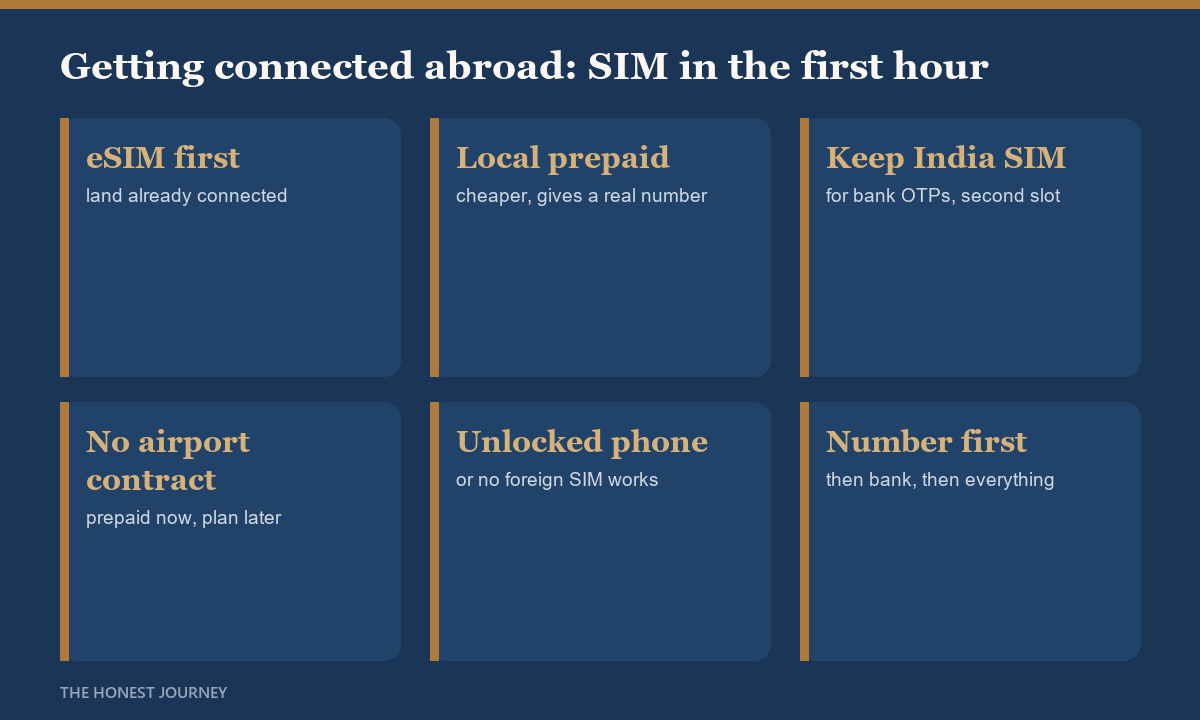
The cleanest setup is to activate an eSIM before you fly so you land already connected, then switch to a local prepaid SIM or plan in your first days once you can compare student deals. Keep your Indian number alive on the other slot for OTPs from Indian banks, which you will still need for months. Do not sign a long postpaid contract at the airport, prepaid first, contract later once you know the good networks and student offers. Connectivity is the key that unlocks the bank, the address and everything else, so treat it as job one.
Students underrate the SIM and then discover on day one that nothing works without a number. You cannot receive the bank’s verification code, the university portal will not send the OTP, the accommodation manager wants to text you, and your family wants to know you landed. Meanwhile your Indian SIM is quietly charging international roaming rates that make a week feel like a phone bill from a bad dream. Getting connectivity right in the first hours removes a surprising amount of first-week friction.
This guide covers the honest setup: what to arrange before you fly, what to do on arrival, how to keep your Indian number for OTPs, and the traps to avoid. It pairs directly with opening a bank account abroad, since the SIM has to come first, and the pre-departure checklist puts it in sequence with your other first-week tasks.
Before you fly: activate an eSIM so you land connected
The smoothest start is to arrive already online. If your phone supports eSIM, buy and activate a travel or destination eSIM before you leave, so the moment you land you can book a ride, message home and start setup without hunting for a shop or airport wifi. A travel eSIM is not the cheapest long-term option, but for the first few days it removes the chicken-and-egg problem of needing a connection to arrange a connection. Make sure your phone is unlocked, an Indian-carrier-locked phone will not accept a foreign SIM, which is why the packing guides stress carrying an unlocked handset.
On arrival: switch to a local prepaid SIM
Within your first days, get a local prepaid SIM or eSIM from a proper local network, which is far cheaper than a travel eSIM for ongoing use and gives you a local number that banks and services accept. Prepaid is the right first choice because it needs no credit history, no local bank account and no contract, all of which you may not have yet. You can usually buy one at the airport, a carrier store, or a supermarket with your passport. Compare the main networks for coverage on your campus and student-specific plans before committing to a monthly amount.
Keep your Indian number alive for OTPs
Do not let your Indian SIM lapse. You will keep needing it for one-time passwords from Indian banks, for your education loan account, for UPI, and for any Indian service tied to that number, often for months or years. The practical setup is a dual-SIM phone or an eSIM plus physical SIM: the local number as your main line, the Indian number kept active on the second slot to receive OTPs. Keep a minimal Indian prepaid plan alive so the number does not get recycled, and be aware many Indian OTPs need the SIM to be reachable, so an inactive number can lock you out of your own Indian accounts.
Prepaid now, contract later
Resist signing a long postpaid contract in your first days, especially at an airport kiosk. Postpaid contracts often need a local bank account, a credit check or an address you do not yet have, and they lock you in before you know which network actually works where you live and study. Start prepaid, learn the good networks from classmates, then move to a student postpaid plan later if it saves money. Many countries have excellent value student and prepaid plans that are not the ones advertised most loudly at the airport.
Country notes worth knowing
- USA: mobile plans are relatively expensive; prepaid from the major carriers or their budget sub-brands is the sensible student start, and campus areas usually have good coverage on the main networks.
- UK: cheap, competitive prepaid (pay as you go) SIMs are easy to get with generous data; a good place for value, switch networks freely until you find the best signal.
- Germany: prepaid SIMs require identity verification (your passport), and some registration steps; discount providers offer strong value once set up.
- Canada: plans are among the pricier ones; compare the budget sub-brands and student offers, and check campus coverage before committing.
The honest closing take
Connectivity is the quiet linchpin of your first week. Land connected with an eSIM, switch to a cheap local prepaid SIM within days, and keep your Indian number alive on the second slot for the OTPs you will still depend on. Skip the airport postpaid contract, prepaid buys you time to choose well. Get this right in the first hours and the bank account, the address, the university portal and the calls home all fall into place. Get it wrong and every other task stalls waiting for a code you cannot receive.
FAQ
Should I get a SIM before or after I fly?
Both, in sequence. Activate a travel eSIM before you fly so you land connected, then switch to a cheaper local prepaid SIM in your first days once you can compare networks and student plans. Make sure your phone is unlocked so it accepts a foreign SIM.
Can I keep my Indian number while abroad?
Yes, and you should. You will keep needing it for OTPs from Indian banks, your education loan account and UPI, often for years. Use a dual-SIM or eSIM setup with the local number as your main line and the Indian number on the second slot, and keep a minimal Indian plan active so it is not recycled.
Is prepaid or postpaid better when I first arrive?
Prepaid, without question. It needs no local bank account, credit history or contract, all of which you may lack in week one. Start prepaid, learn which network works on your campus, then move to a student postpaid plan later only if it saves money.
Why do I need a local number so urgently?
Because banks, university portals, accommodation and most apps send verification codes to a local number, and setting up your bank account and other essentials depends on receiving them. A local SIM is the key that unlocks the rest of your first-week tasks, so arrange it first.
Do I need an unlocked phone?
Yes. A phone locked to an Indian carrier will not accept a foreign SIM or eSIM. Carry an unlocked handset so you can slot in a local SIM or activate a destination eSIM immediately on arrival.